
Entries look shifted one day forward
If the displayed date and time are different from the entered date and time, please check the time zone settings.
1 Check calendar name
Please register a new calendar entry to run a test.
After registration, when you open the details screen of the Event entry (the screen where the edit and delete buttons are displayed), next to the title you will see a drop-down arrow. Use a drop-down arrow to set and check the needed calendar name.
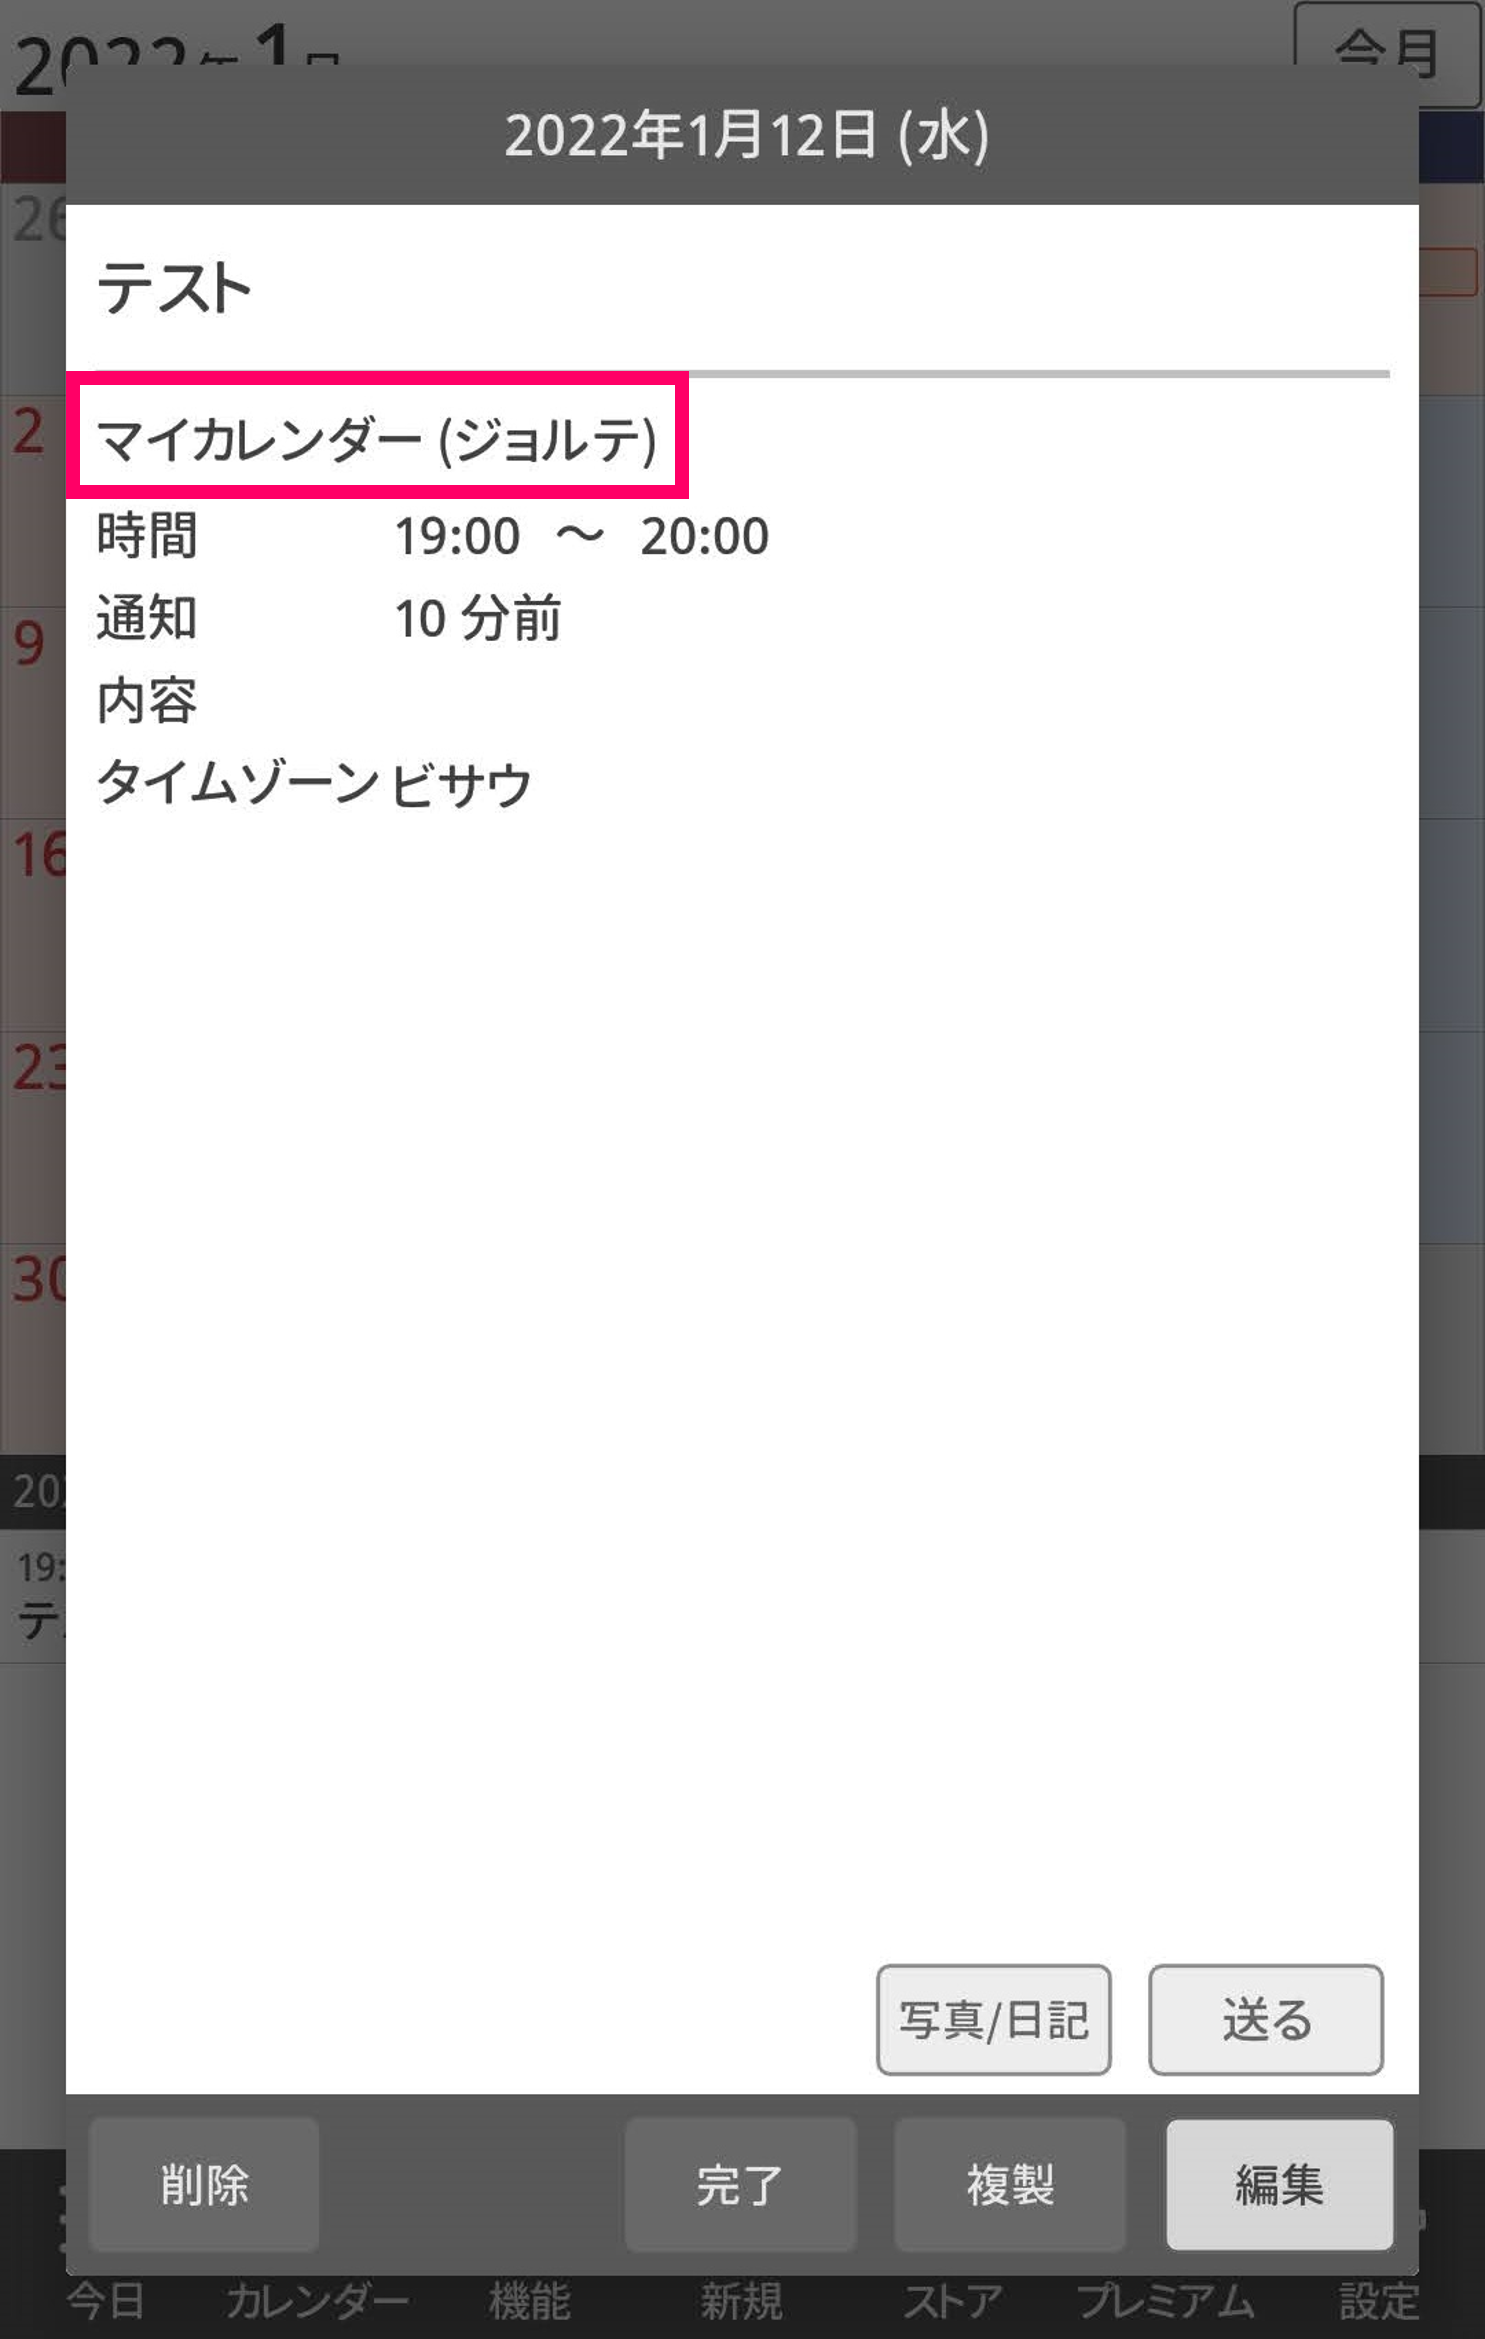
2 The calendar name is set to be "My Calendar (Jorte)" and the newly registered entry is off
- Launch the Jorte app and tap [Calendar] on the calendar screen toolbar
- Tap [My Calendar Jorte (○○ items)] in the Jorte Calendar
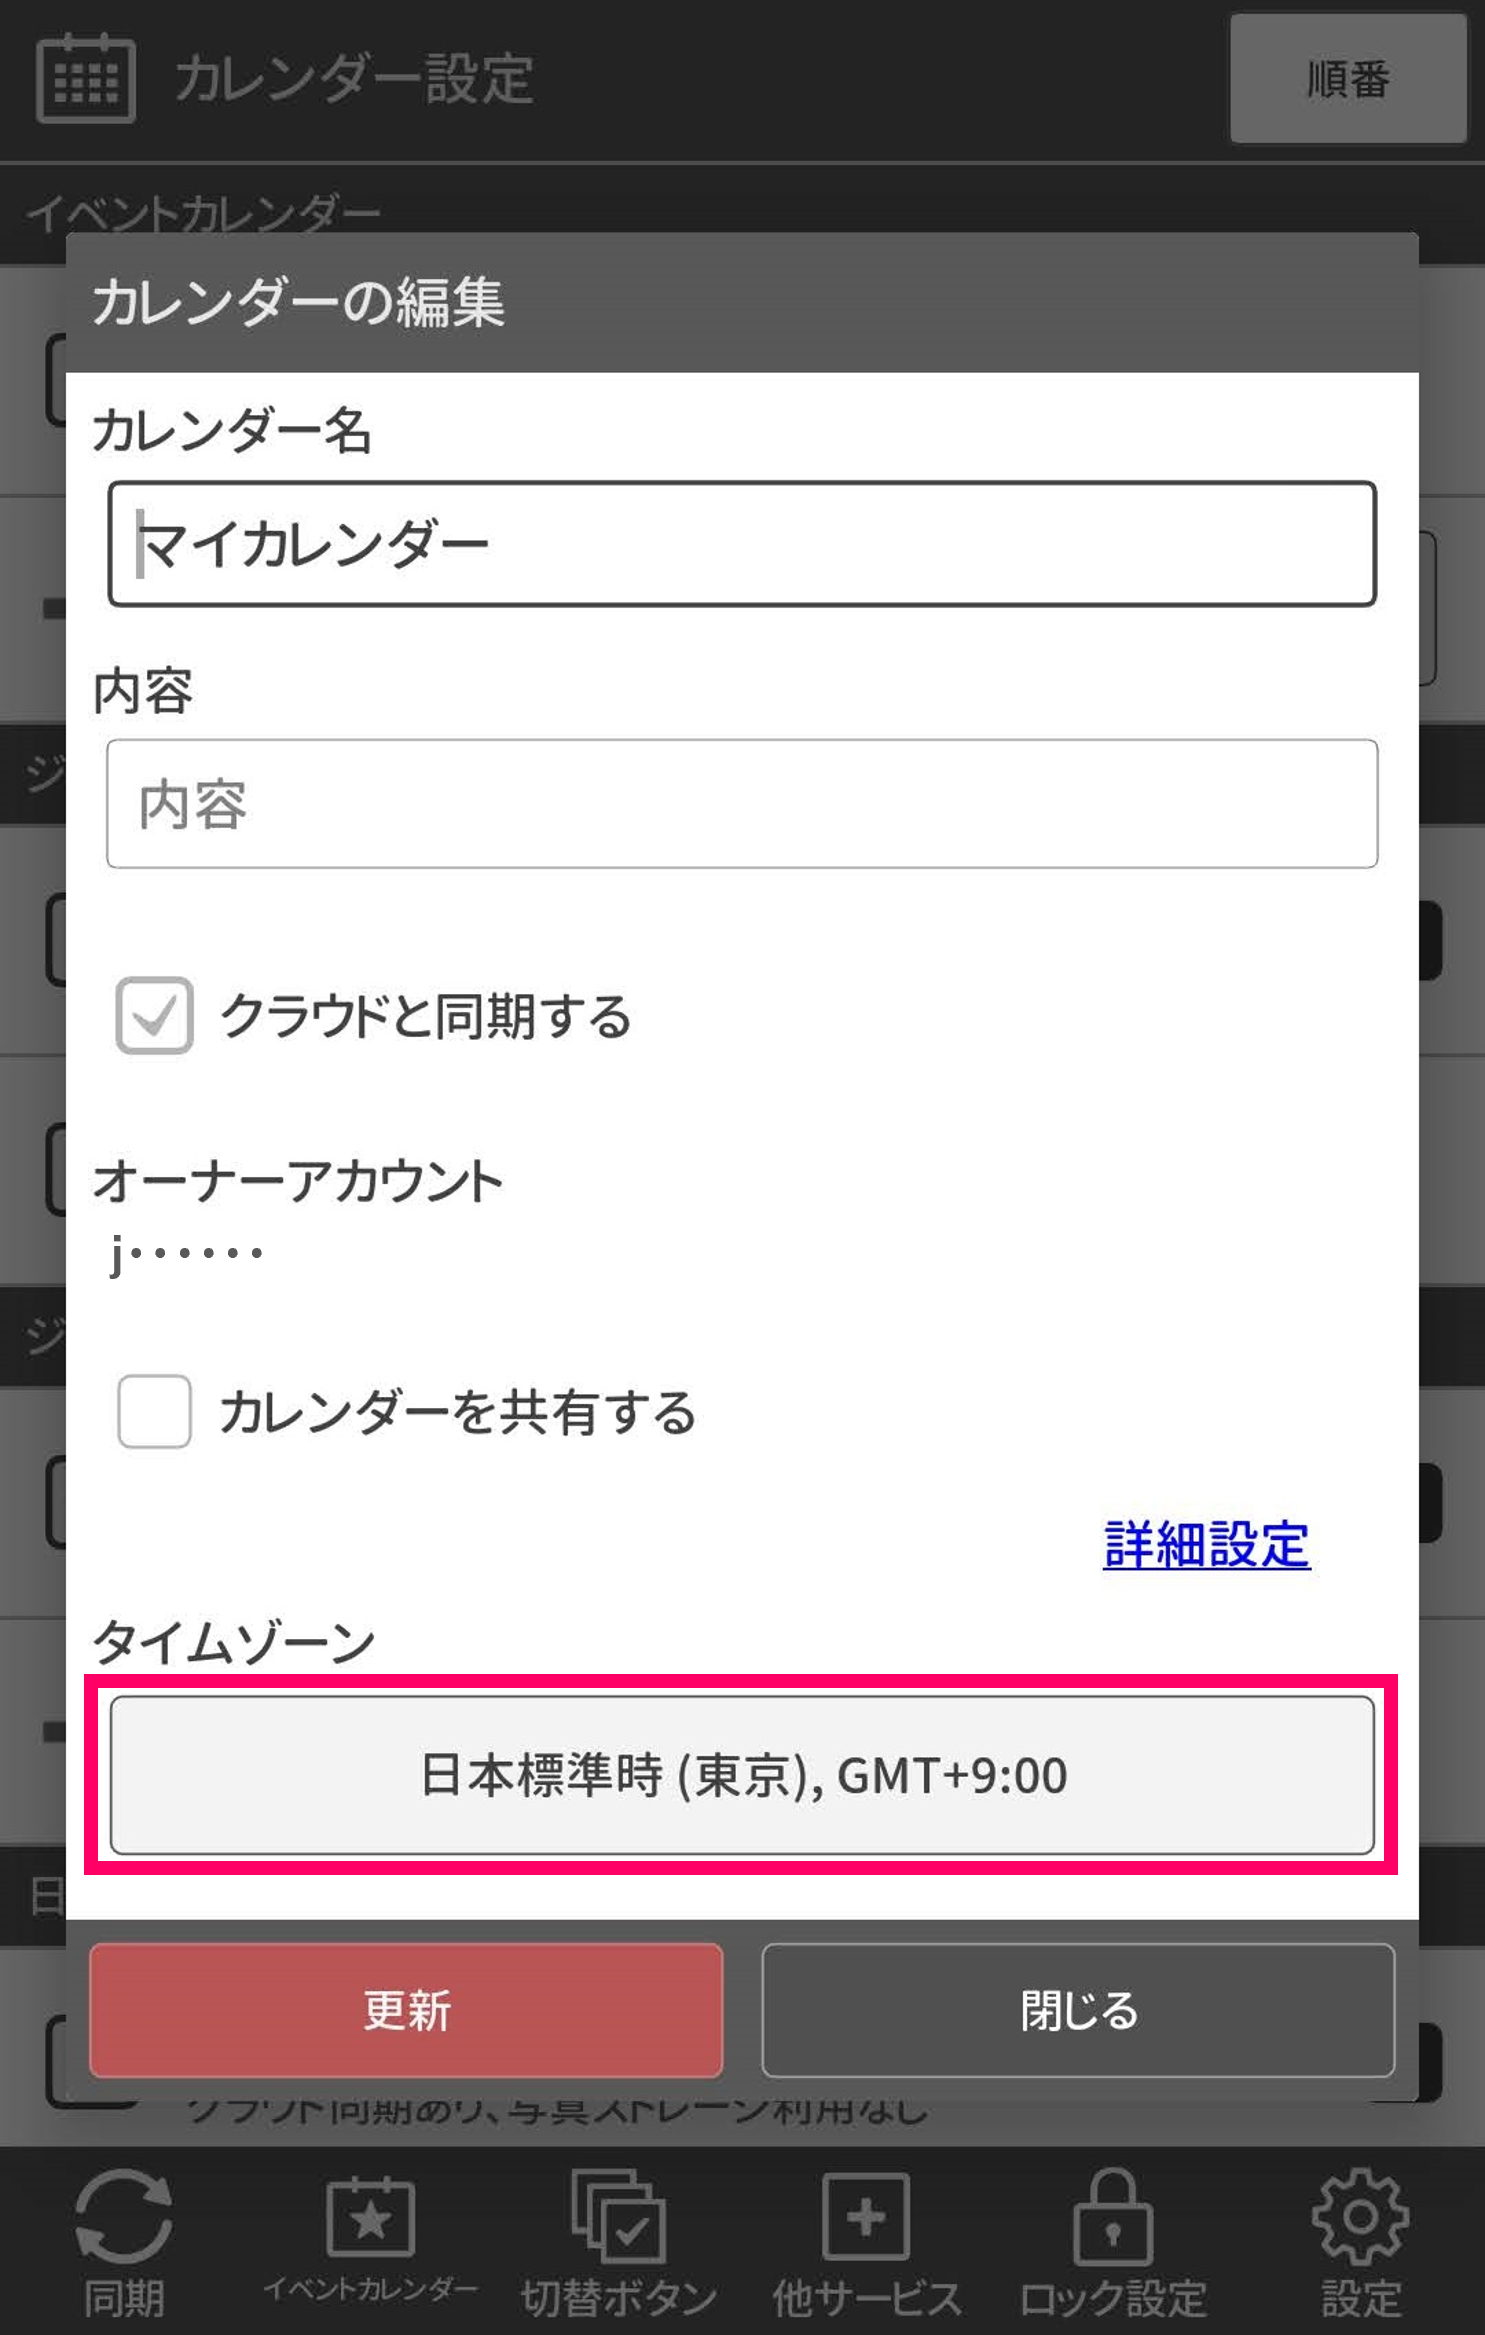
- Tap [Edit]
- Tap [Advanced]
- Set the needed time zone.
- Tap [Refresh]
- Go back to the calendar view
- Register a new event and check if it is displayed with the entered date and time
3 If the calendar name is "My Calendar (Jorte)", new registrations will not be lost, only past entries will be lost span>
- Launch the Jorte app and tap [Calendar] on the calendar screen toolbar
- Tap [My Calendar Jorte (○○ items)] in the Jorte Calendar
- Tap [Edit]
- Tap [Advanced]
- Confirm that the time zone is set to the needed time zone.
- Tap [Refresh]
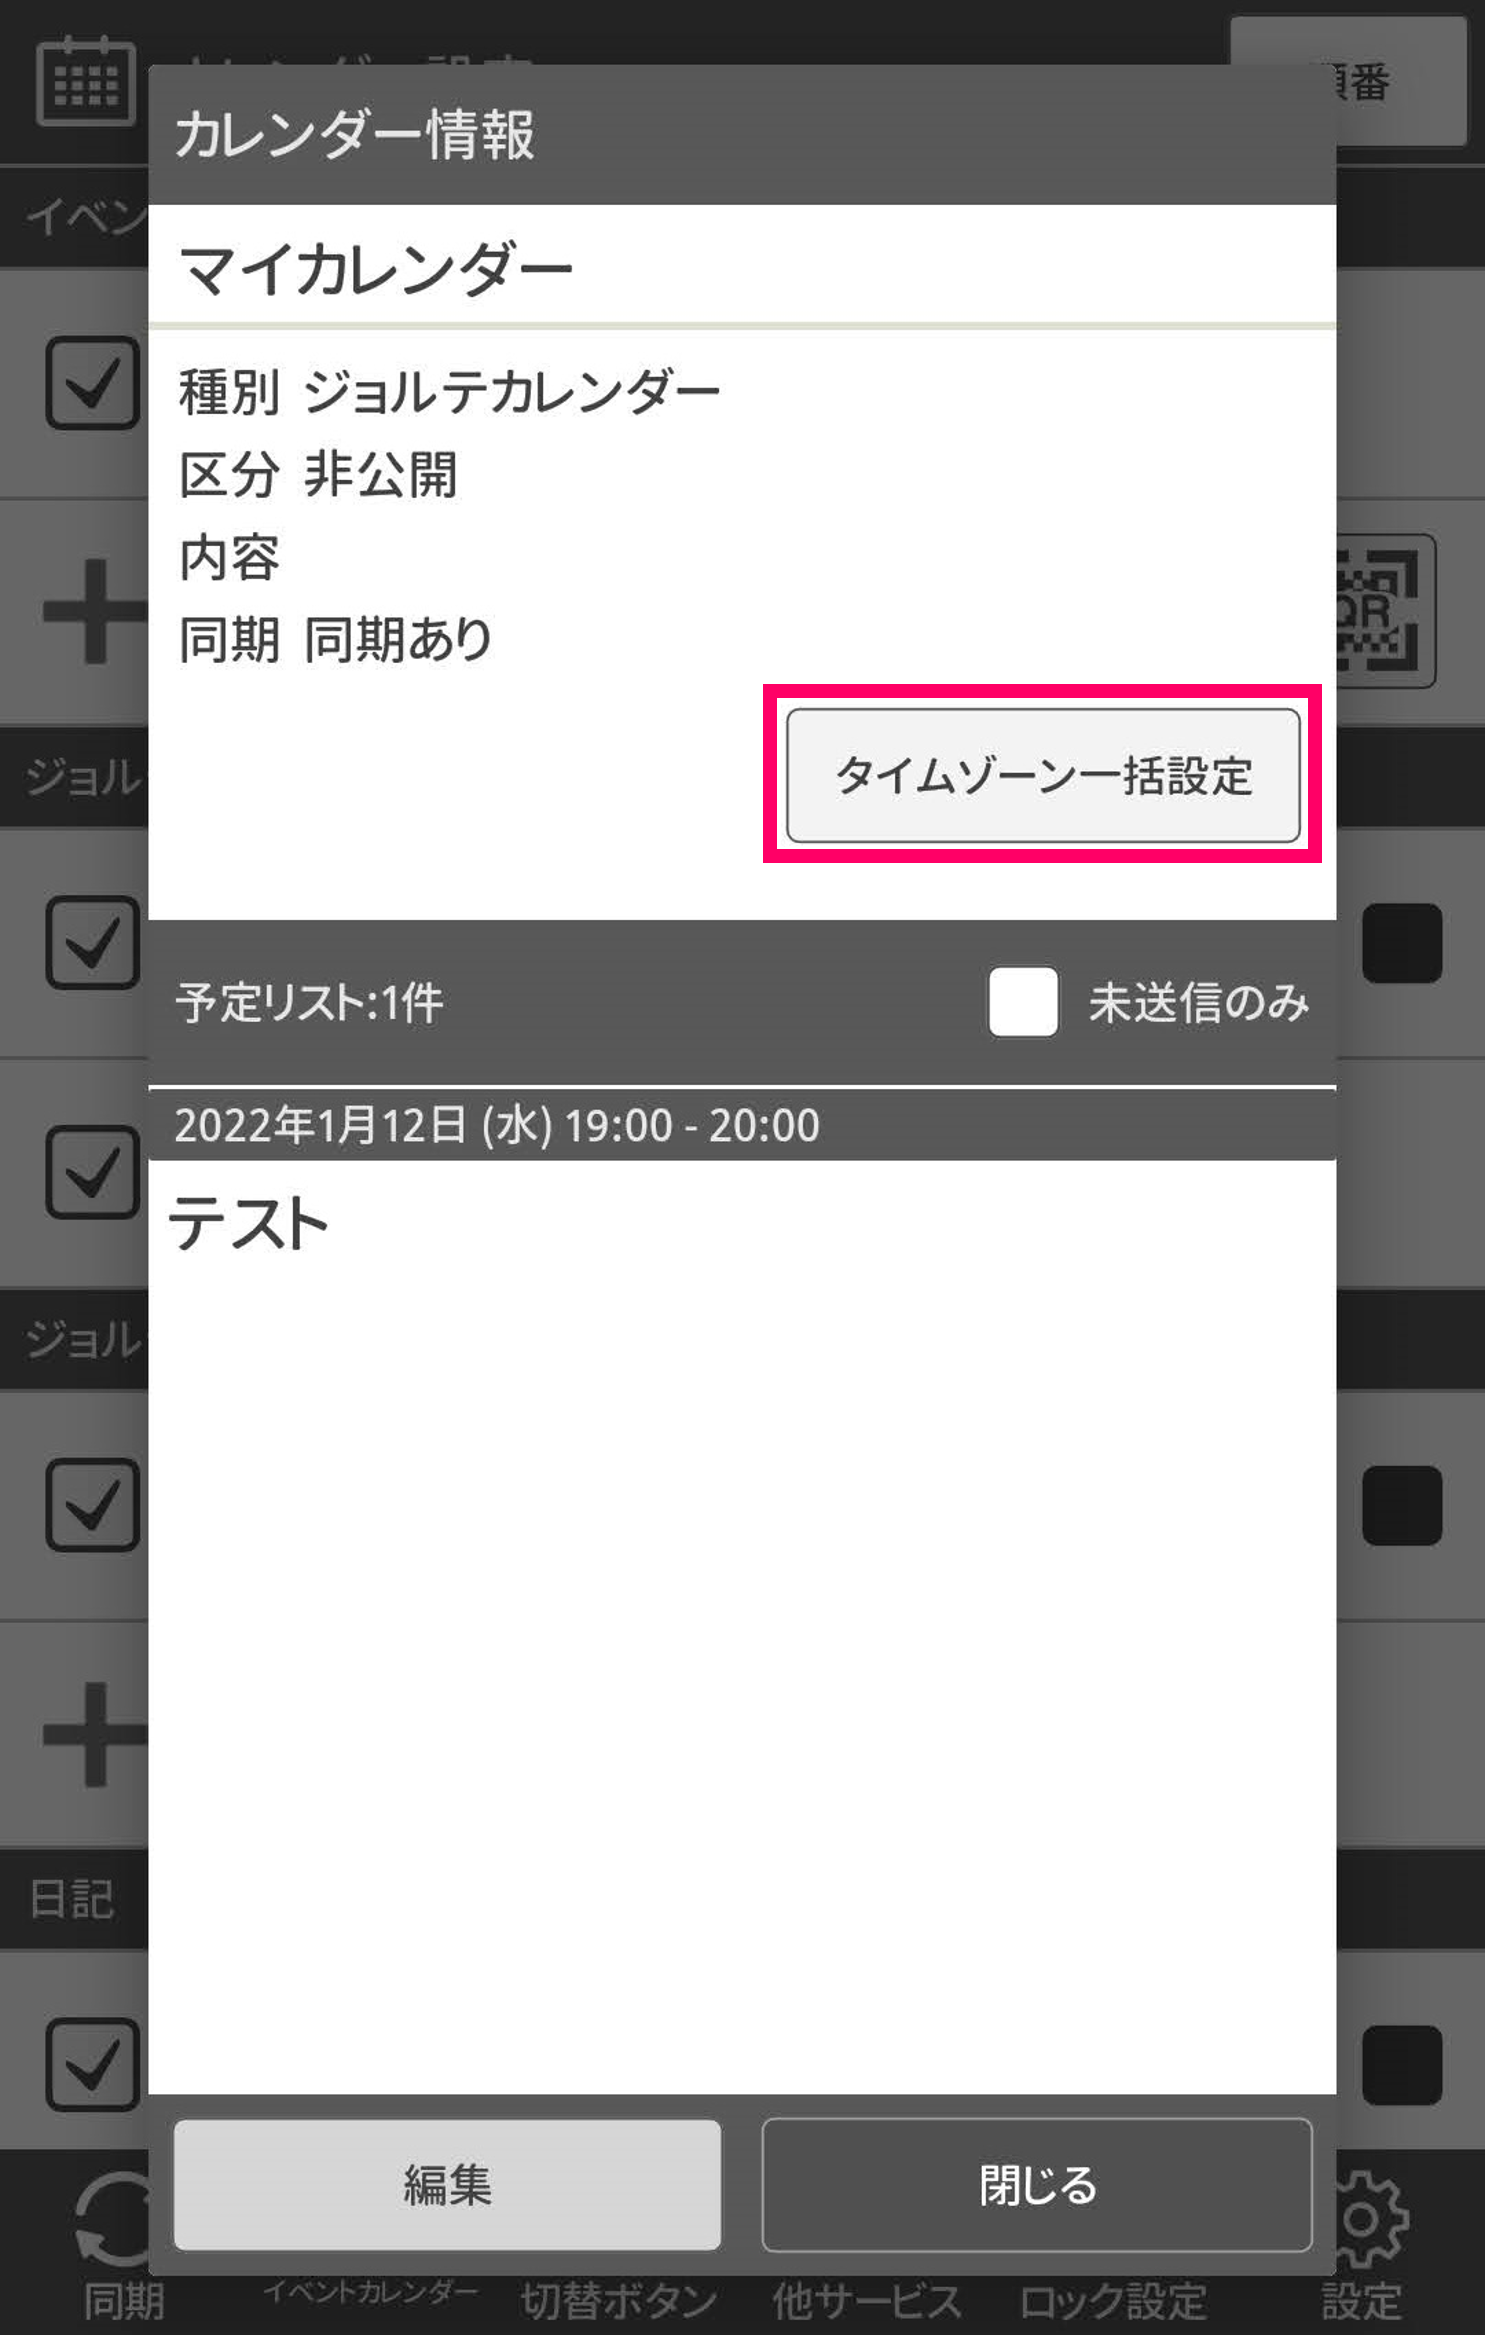
- Tap [My Calendar Jorte (XX items)]
- Tap [Change Timezone on events]
- Check the contents and tap [OK]
- Return to the calendar screen
- Check if it is displayed with the entered date and time
4 The calendar name is "My Calendar (Jorte PF Calendar)" and the newly registered entry is off
- Launch the Jorte app and tap [Calendar] on the calendar screen toolbar
- Tap [Jorte PF Calendar (○○ items)]
- Tap [Edit]
- Set the needed time zone.
- Tap [Refresh]
- Go back to the main calendar view
- Register a new event and check if it is displayed with the entered date and time

5 The calendar name is Google Calendar name, new registration schedule is shifted
- Log in to Google Calendar on the web on your computer
- Press the gear icon at the top right of the screen
- Press Settings
- Press the calendar name confirmed in "1" from My Calendar Settings on the left side of the screen
- Set the needed time zone in the calendar settings.
- Start the "Calendar" app that is pre-installed on your smartphone
- Tap the three-line icon in the top left
- Tap [Settings]
- Tap [General]
- Uncheck [Use device time zone]
- Set Time Zone to the same time zone as it is set on your phone and in the Jorte app.
* The procedure for using the default "Calendar" app on the phone differs depending on the device.

6 Calendar name is a Google calendar, newly registered entry is not changed, only past calendar entries are changed
- Log in to Google Calendar on the website on your computer
- Press the schedule that is shifted with Jorte
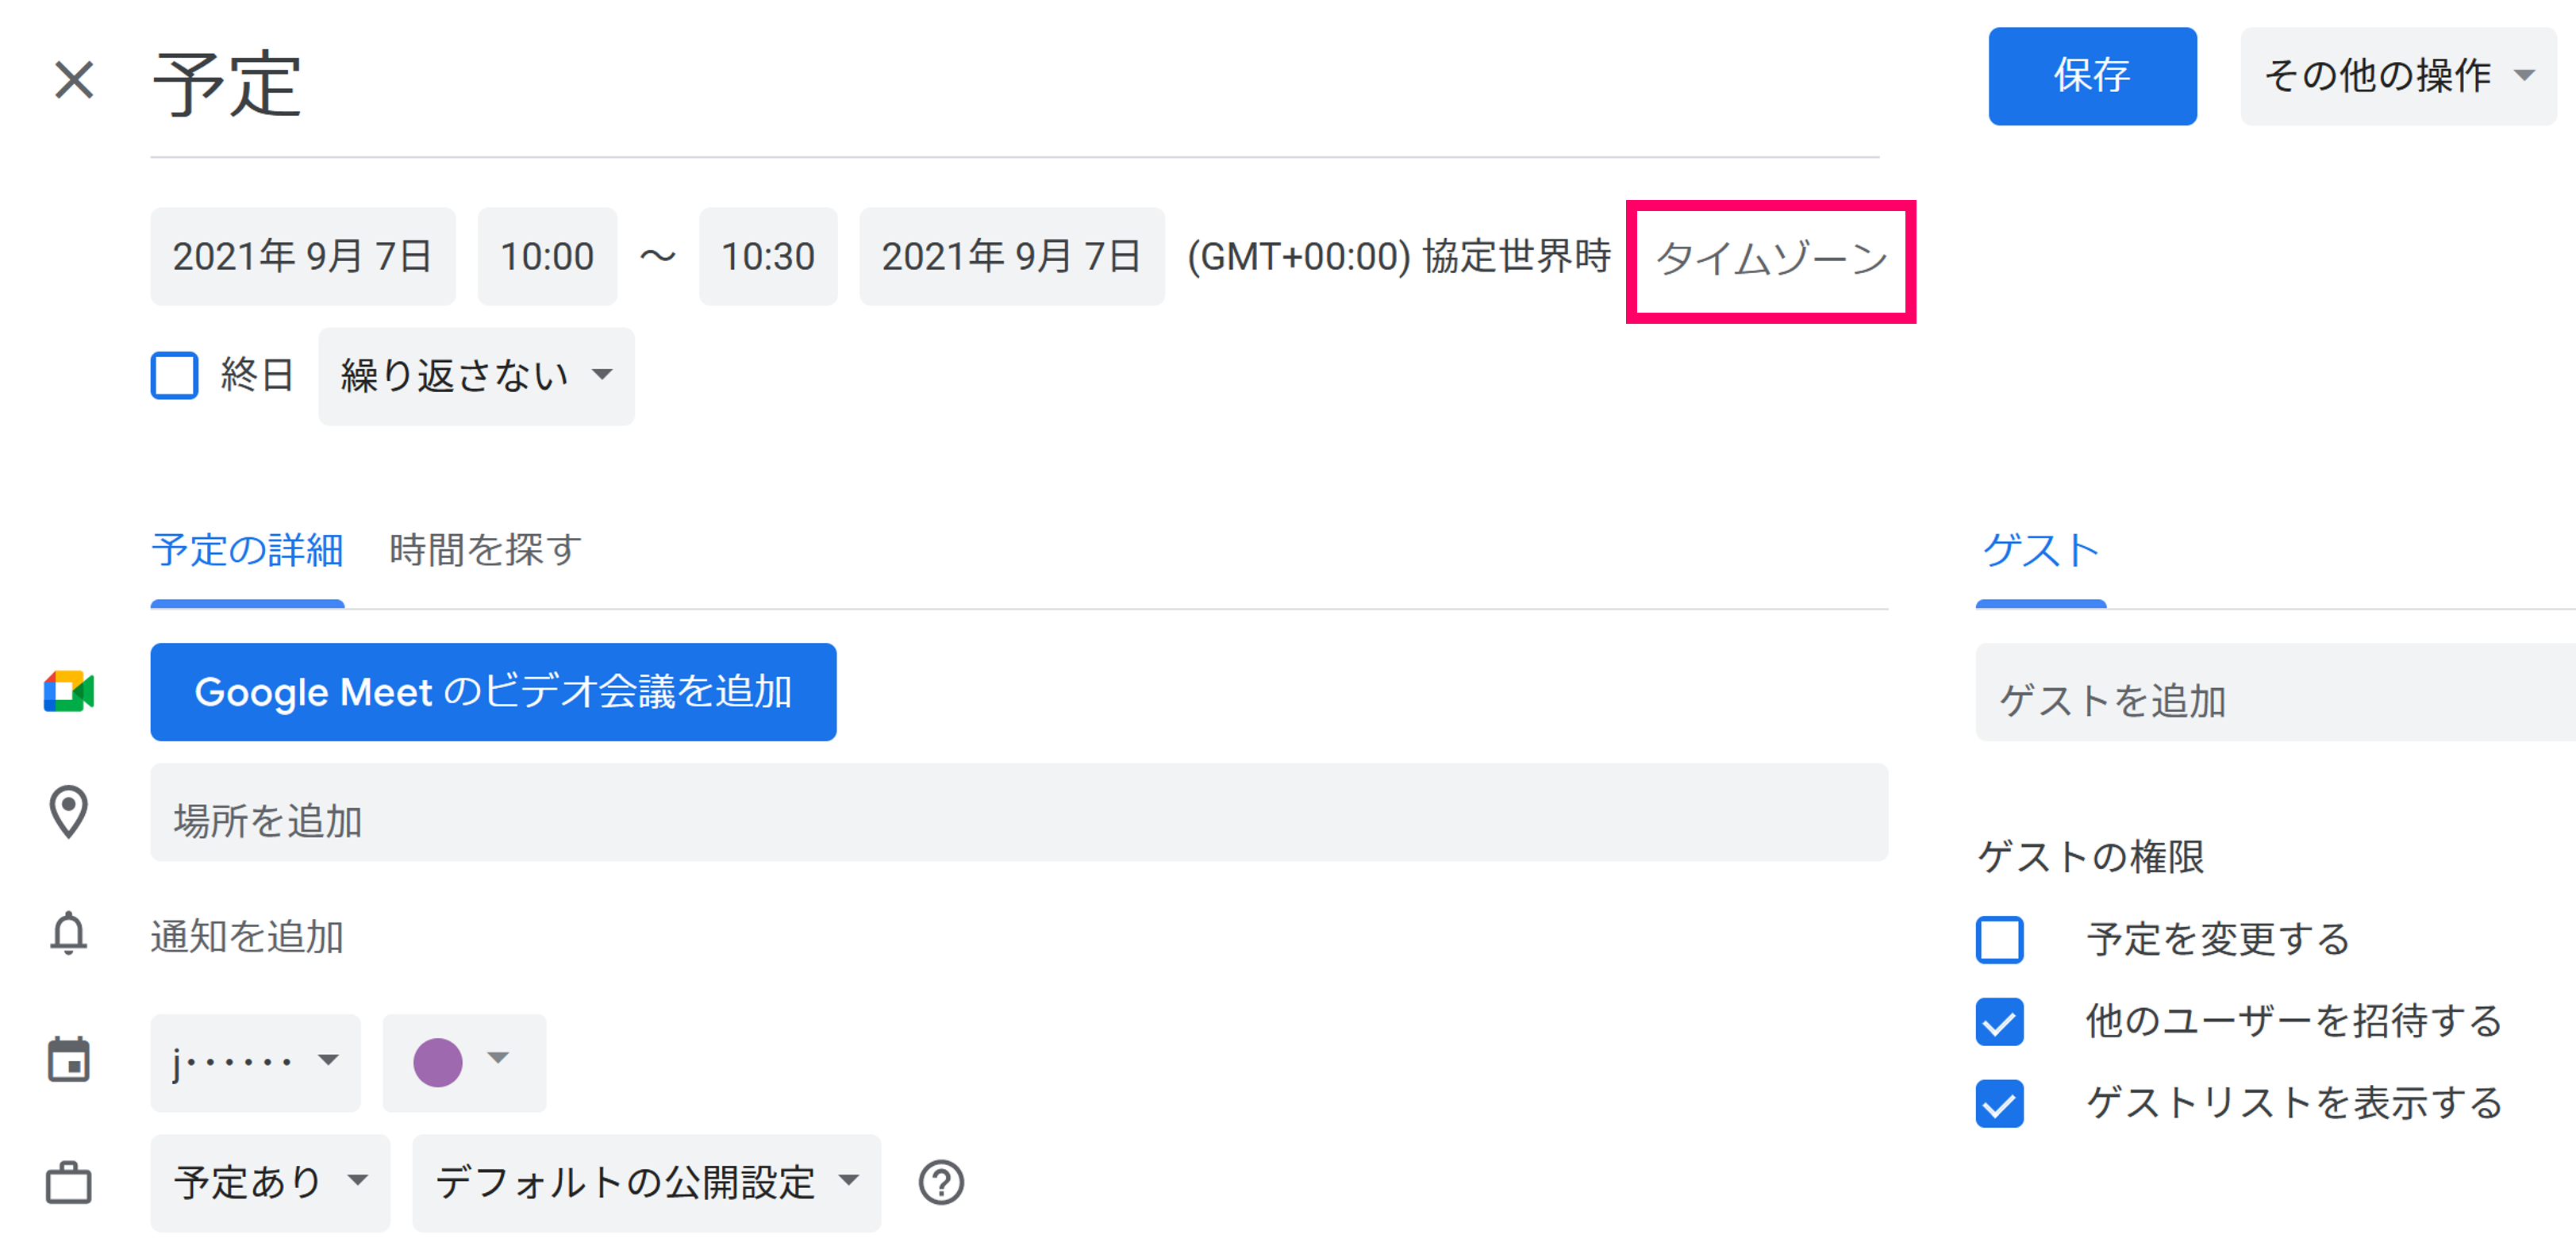
- Press [Edit]
- Check if the timezone is set to the needed time zone.
- If the time zone needs to be edited, press [Time Zone]
- Select the needed time zone. The main would be the time but not the name of the location
- Press [OK]
- Press [Save]
- Confirm that the date and time entered in the web Google calendar are displayed
- Start the "Calendar" app that is pre-installed on your smartphone
- Confirm that the entered date and time are displayed
- Launch the Jorte app
- Confirm that the entered date and time are displayed the same
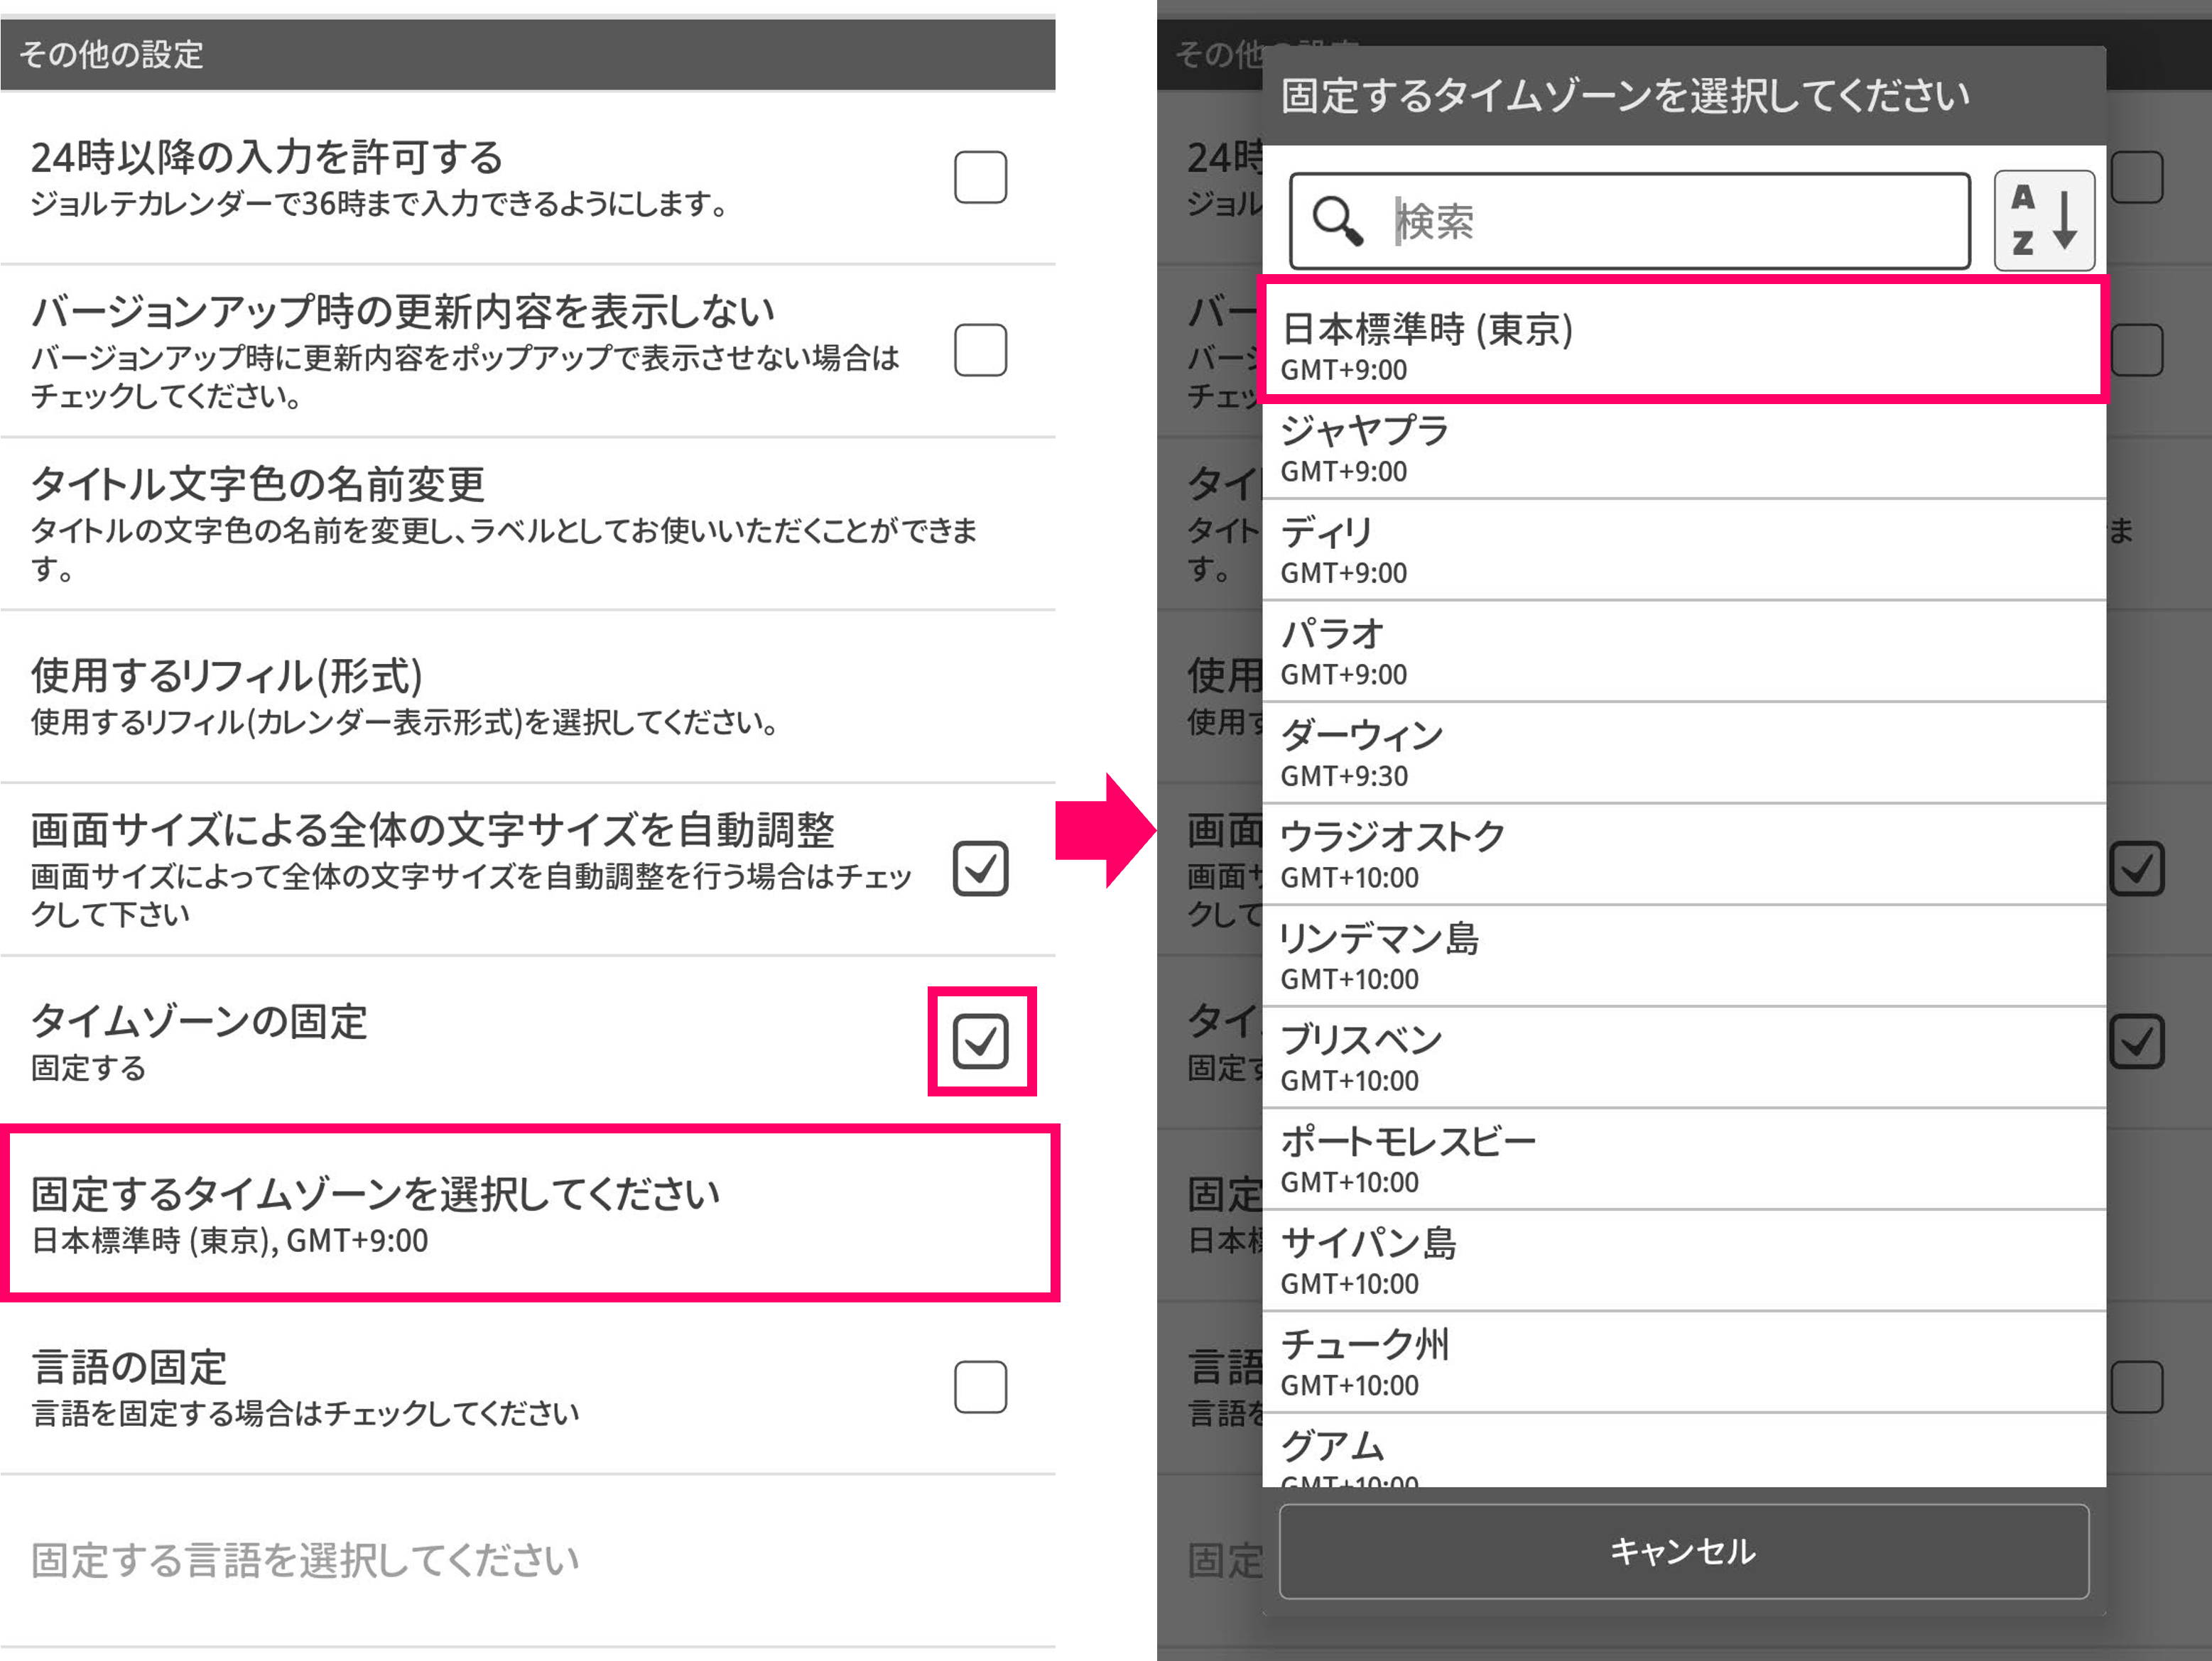
7 The timezone for each entry is (for example) Japan Standard Time and you are overseas
- Launch the Jorte app and tap [Settings] from the calendar screen toolbar
- Tap [Advanced Settings]
- Select [Other Settings]
- Tap [Select Time Zone to Lock]
- Select a needed time zone
- Example [Japan Standard Time (Tokyo): GMT+9:00]
- Return to calendar screen
- Close Jorte with home button
- Tap the ■ next to the home button
- Close all apps from recent apps
- Launch the Jorte app
- Check if the event is displayed with the date and time you entered
8 Smartphone settings
- Open Settings on your smartphone
- Select [Date and Time]
- Uncheck Use network-supplied time zone
- Set the needed Time Zone.
 Contact us by email