
Backup to Jorte Cloud
The data that can be backed-up to the Jorte Cloud are the entries registered in the Jorte's original calendar (such as "My Calendar Jorte", "My PF Calendar (Jorte)"), Jorte Task lists, and diaries.
Please note that schedules such as Google Calendar cannot be backed-up.
1 Register Jorte ID
- Enter the required information in Jorte ID registration (free) Tap [Create]
- A temporary registration email will be sent to the registered email address, so check the email
- Tap the URL in the temporary registration email and enter the registered password
- Confirm that an e-mail confirming the completion of registration has been sent to the registered e-mail address
*If you do not receive a reply e-mail, please try using a PC e-mail address such as Gmail or Yahoo!
*Please do not forget your Jorte ID (username), password, and email address used to register your Jorte Cloud account.
2 Sync with Jorte
- Launch Jorte app
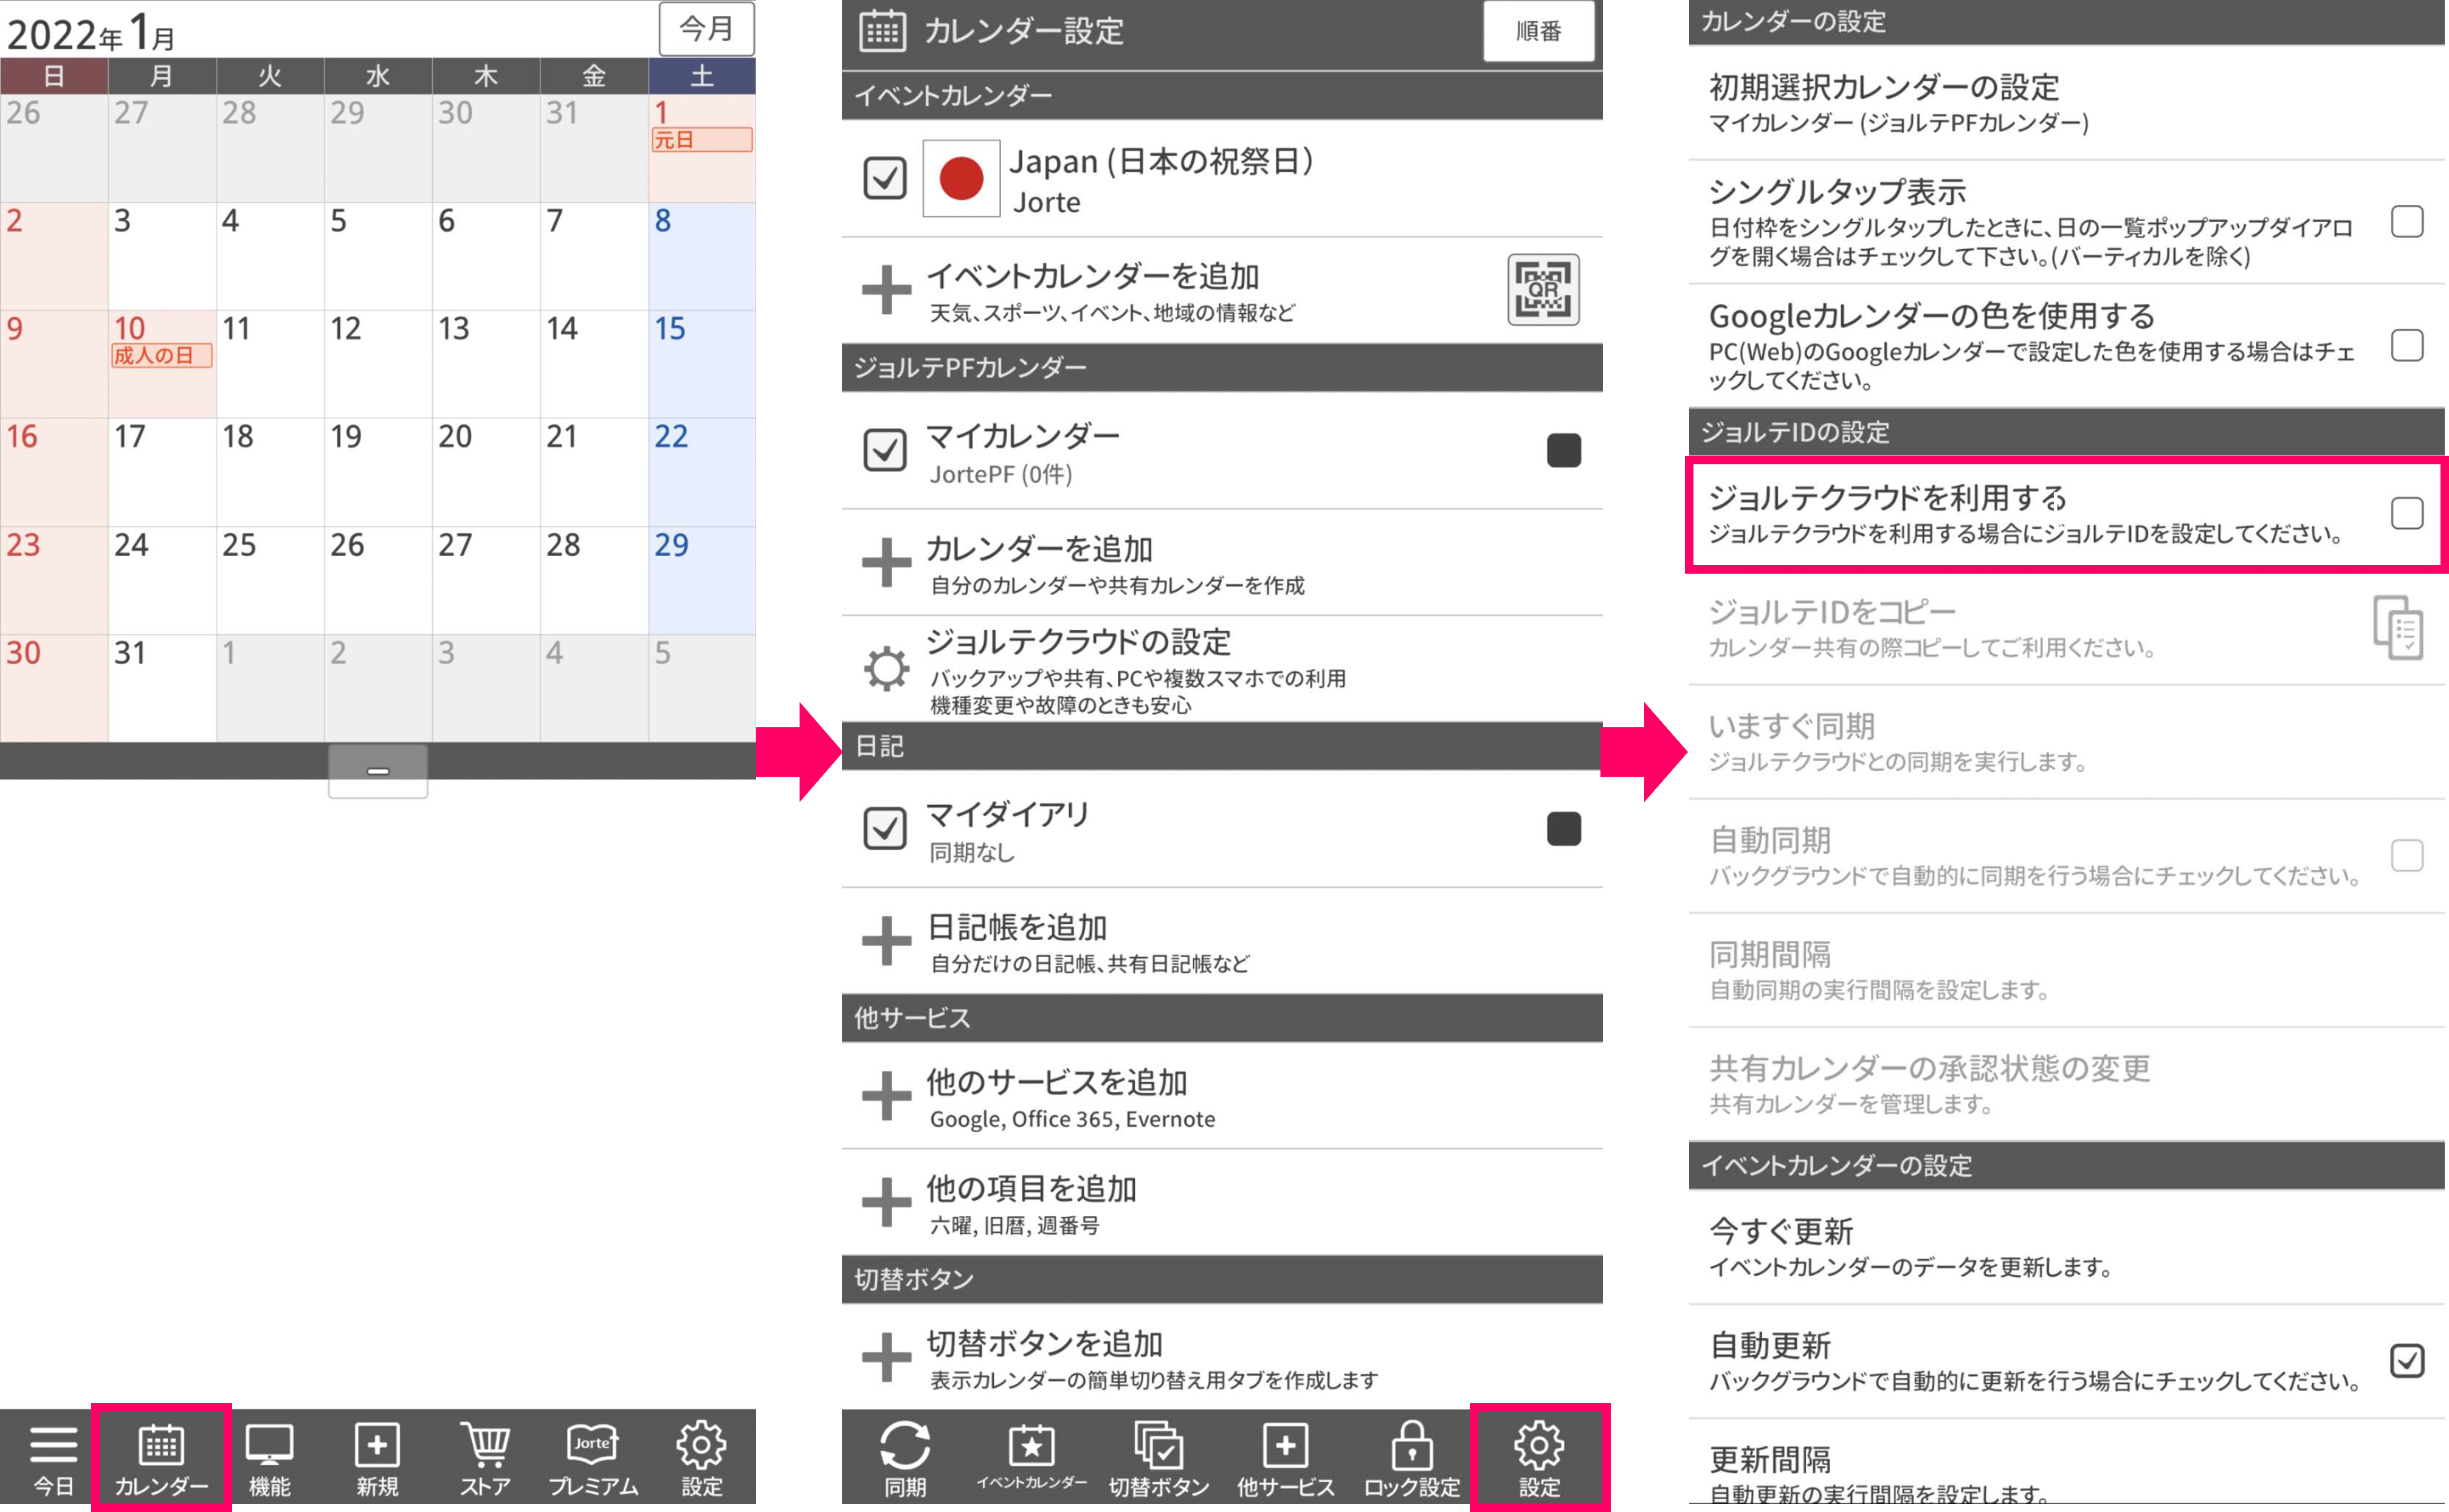
- Tap [Calendar] from the calendar screen toolbar
- Tap [Settings] from the calendar settings screen toolbar
- Tap [Use Jorte cloud]
- Enter the Jorte ID (username) and password you registered in "1"
- Tap [Login] to start syncing
*After synchronization is complete, the Jorte ID set in [Use Jorte Cloud] cannot be changed to another Jorte ID.
3 Check if the backup is showing on the Jorte Cloud site
- After synchronization is complete, open https://jorte.com/calendar/mypage on a computer, etc.
- Enter your Jorte ID and password to log in
- Make sure you see synced/backed-up entries showing
*If you do not see synced data showing, try updating after a while, please.
*Please check if Tasks and Diaries (photos) are displayed at https://jorte.net/login/ .
4 Transfer data to another device
- Start the Jorte app on the phone where you need to transfer Jorte Calendar entries
- Tap [Calendar] from the calendar screen toolbar
- Tap [Settings] from the calendar settings screen toolbar
- Tap [Use Jorte cloud]
- Enter the Jorte ID (username) and password you registered in step 1 and tap [Login]
- Select [Sync now]
- Go to the main calendar view and check if synced entries are showing
[Notes]
- Even if you delete your current Jorte ID and register a new Jorte ID, you cannot change the Jorte ID you have set for Jorte. (requires reinstallation of the app)
Also, if you delete the Jorte ID, the data on the Jorte cloud will be deleted and cannot be recovered.
Please do not delete the Jorte ID set in Jorte. - When changing phone models or reinstalling the Jorte app, please turn off "Automatic restore" or "Backup to Google Drive" in the smartphone settings and install Jorte.
*The procedure may differ depending on the phone model. - When setting automatic synchronization with Jorte Cloud, exclude Jorte from task killers, energy-saving apps, smartphone energy-saving (eco) settings, and battery optimization settings.
 Contact us by email